Brandkit Help Centre
You can find how to guides, articles, tips and tricks and documentation about Brandkit software.
Please note: This Help Center is aimed at Brandkit account Owners and Admin users. End-users shoud consult the FAQs provided in each Brandkit.
To use this site: First view the Admin interface map below.
Then choose a topic cluster (Getting Started, FAQs, How to, Tricks,Training Video) or just search.
If you can't find what you need, please email Brandkit Support for assistance: support@brandkit.io or contact us.
Albums


~ but first ~
Admin Interface Map
(the Admin interface explained)
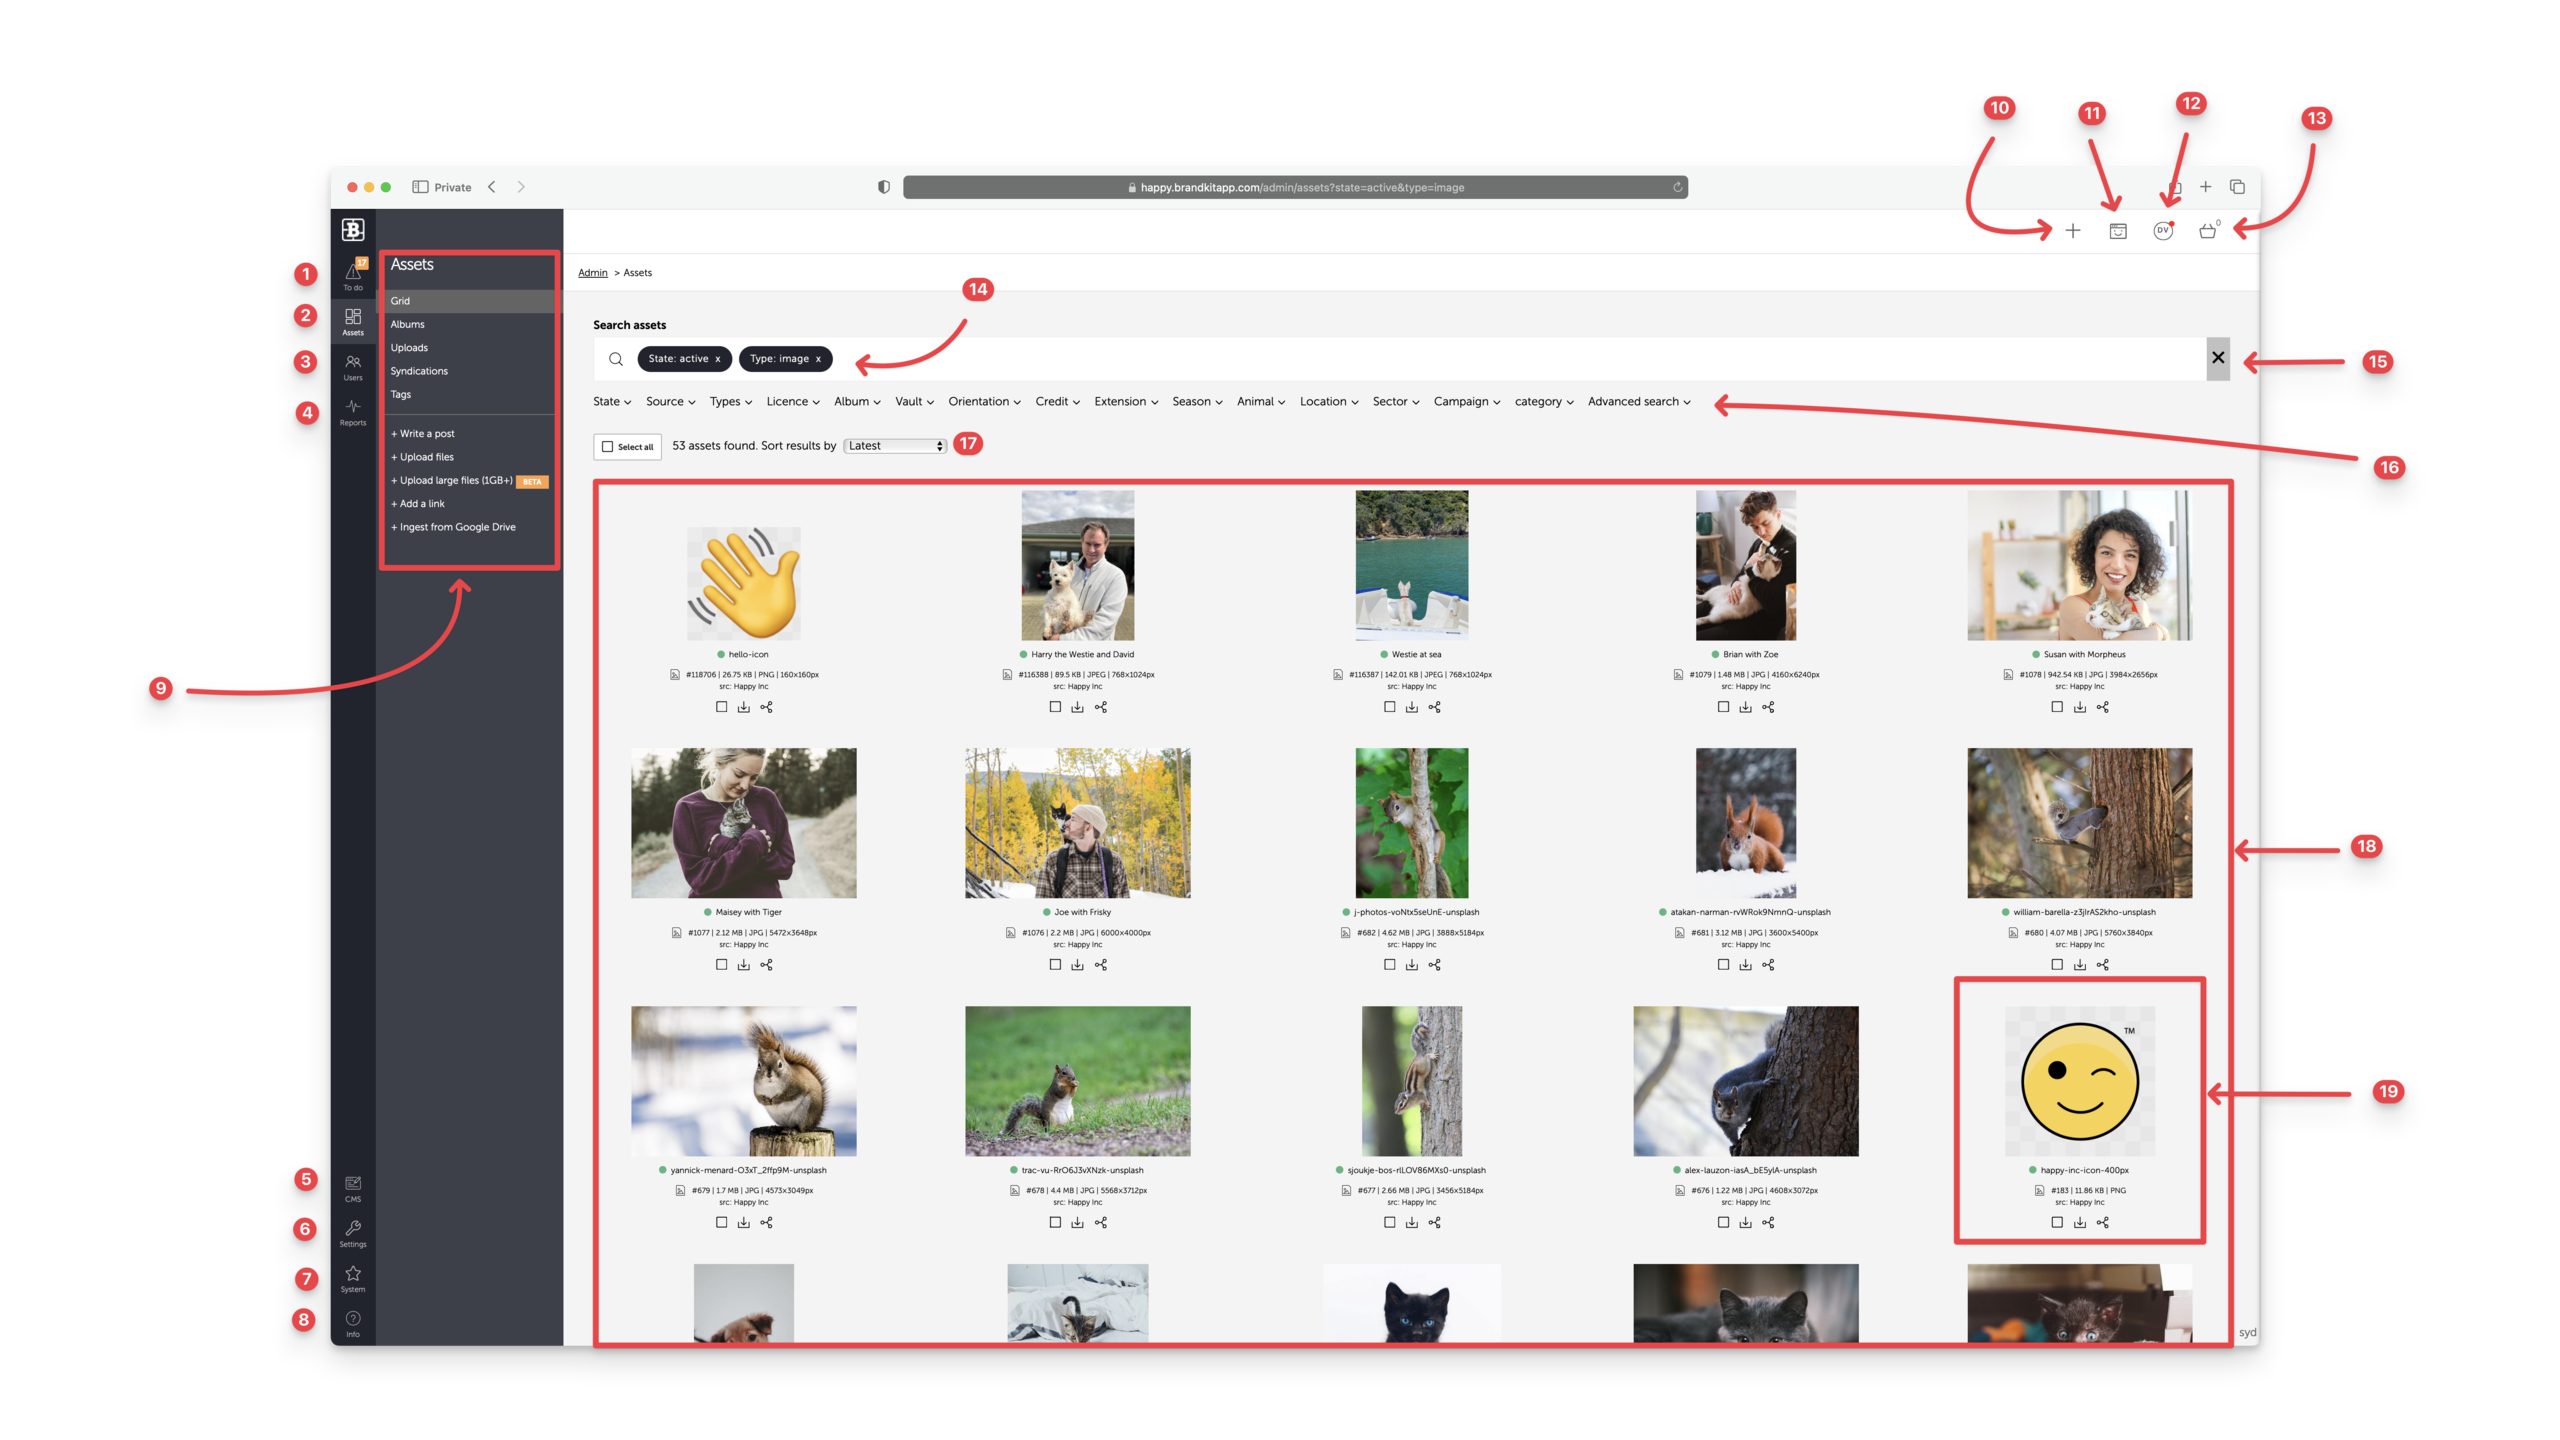
Admin Main Menu (left-hand side)
- (1) To Do - The To Do list, displays a list of items that need attention (e.g. Draft Assets, Access Requests, etc). It includes a count of open items. Clicking the To Do icon will open a To Do page. Click each item on that page to take action:
- Pending Requests - lists Download Requests that need answering.
- Unapproved Assets - List of Draft (Unapproved) Assets
- (2) Assets - Assets, displays the Asset Gris and is the default view when logging into Admin:
- Grid - The default Assets view.
- Albums - List of all Albums
- Uploads - List of all Uploads
- Syndications - List of all Syndications (Advanced feature)
- Tags - List all Tags.
- (3) Users - Users displays a list of users registered in the system where Admins can Manage Users, send user Invitations and manag Requests:
- Users - Manage users.
- Invitations - Manage Invitations
- Requests - List of all Download Request (pending and aleady processed)
- (4) Reports - Reports displays the Contenet Analytcs Dashboard. Web Analytics and other reports are availkable from the sub-menu:
- Web Analytics Dashboard
- Content Analytics Dashboard
- Assets Metadata - Filterable and downloadable list of Asset metadata
- Assets Activity - Filterable and downloadable list of Activity per Asset
- Account Activity - Filterable and downloadable list of Activity in the Account
- Users Activity - Filterable and downloadable list of Activity per User
- Top Downloads - List of Assets by download count
- Top Views - List of Assets by view count
- Top Sources - List of source domains for account activity
- Top Users - List of Users by activity
- (5) CMS - CMS is where you can edit the Brand Portal design and layout, edit portal page copy, etc.
- (6) Settings - Settings is wehere you configure your account settings. Some items are available to the Owner User Role only.
- (7) System - System is only accessible by Brandkit support staff and is wehre system wide settings are managed.
- (8) Info - Info link to the Brandkiit Help Centre.
- (9) Sub menus - Each of the above has a sub-menu.
Asset Grid - Page
- (14) Searchbox - use the Searchbox to search primary meta fields - will also display filter selections.
- (15) Clear Searchbox button - Clears the current search in the searchbox.
- (16) Advanced search Filter - Use Advanced search to search in specific metadata fields.
- (17) Sort order - Changes the sort order of Assets in the search results below.
- (18) Asset Grid - Display all the Assets in the current search result (or all assets if there is no search).
- (19) Asset Card - Each asset is displayed with a thumbnial, basic information and 3 action buttons (Select, Download and Share). Click the Asset card to open the Asset's Asset Page.
Admin Personal Menu (top right side)
- (10) + - Add Assets. You can choose between uploading files, writing posts, adding a link tian external url, ingesting from Google Drive and more.
- (11) Portal (smiley-face browser icon) - Switch to the Portal interface (You can switch back to the Admin interface by clicking the Cog wheel icon in the Portal interface).
- (12) My Menu (your initials in a circle) - Displays a list of personal options such as My profile, My History, My Notifications, Logout, etc
- (13) Basket - Opens the Basket to display your currently selected Assets. The Basket menu provides several batch operation options:-
- Edit - Opens the batch edit/batch operations menu.
- Save - Launches the Save workflow for the Assets selected in the Basket
- Share - Launches the Share workflow for the Assets selected in the Basket
- Download - Launches the Download workflow for the Assets selected in the Basket
- Clear All - Clears the Basket by deselecting all Assets in the Basket.